 |
|
|
Silk Spinning - Polyphemus
Antheraea polyphemus is closely related to the tussah silkmoth, Antheraea mylitta. It produces a very similar silk, light tan in color and very shiny and strong.
This is the process I use for degumming and processing the Polyphemus wild silk
cocoons into yarn.
These are the cocoons. Because they have all hatched, each one has a hole in one of the ends where the moth emerged. The moth secretes an enzyme called cocoonase which dissolves some of the silk; the silk around the hole is often brittle because of that. These are cocoons that I raised in my house this summer. The caterpillars were raised on red oak leaves.

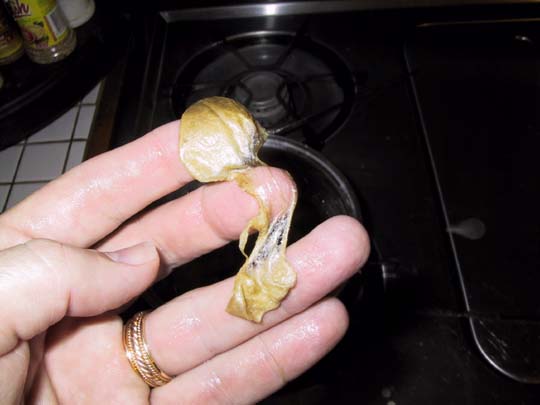
This is a single cocoon, slit down the side so that you can see the pupal shell inside. The shell and a shed caterpillar skin remain after the moth emerges; it is flaky and very thin, and it's difficult to get it out of the yarn if it gets in there. It's much easier to take it out now, before the simmering.
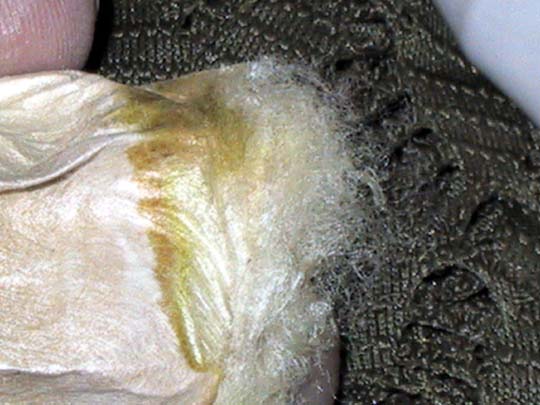
Here, you can see the damaged edge where the cocoonase dissolved the silk so
the moth could dig its way
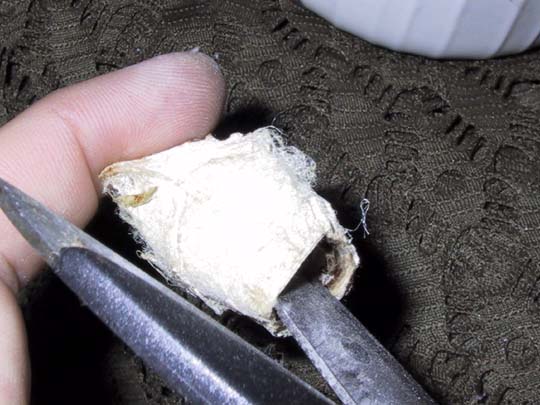
I'm trimming the tip of the cocoons. This enlarges the hole, and wastes a little bit of silk, but it does a lot of good in terms of allowing me to clean out the cocoon, and getting rid of any of the brittle silk.
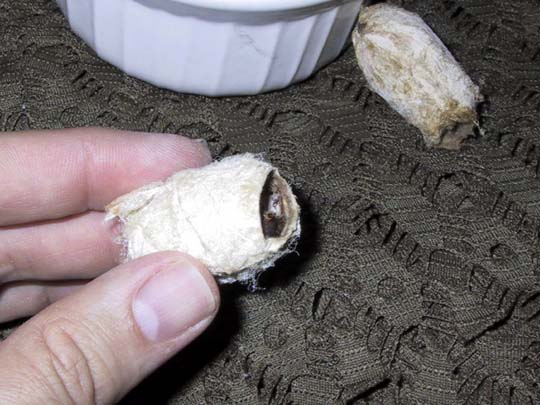
The cocoon doesn't really lose a lot of silk.
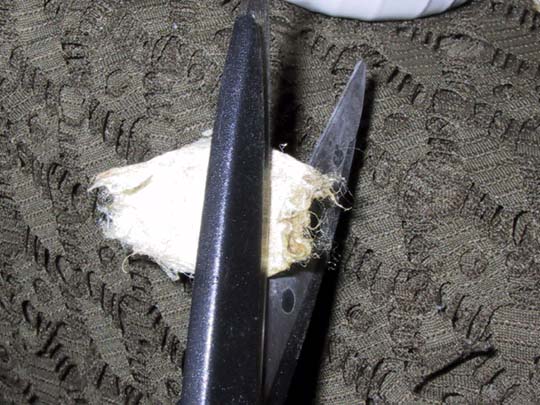
I dig the pupal shell and caterpillar skin out with the tip of the scissors.
The inside of the cocoon is very smooth, and feels like brown paper bag, only much nicer.
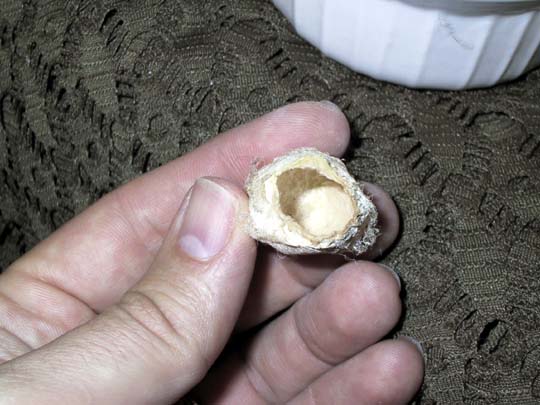
See, all nice and clean now!
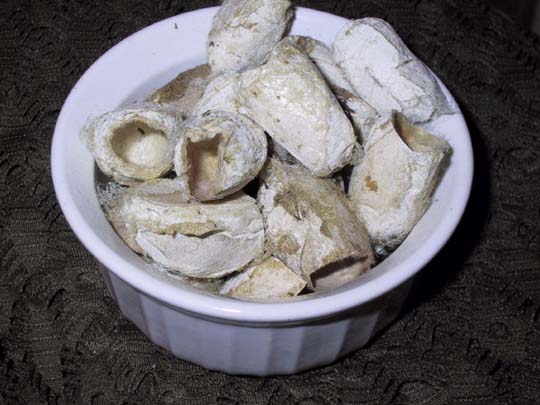
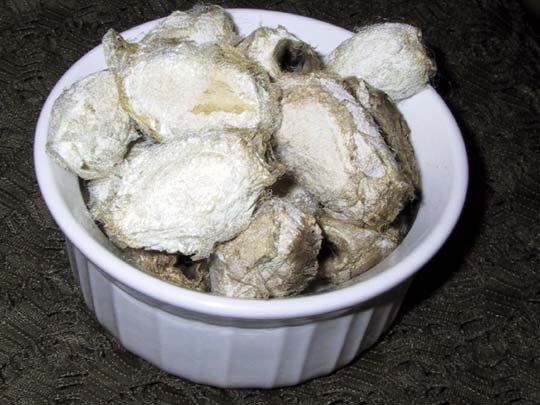
The trimmed cocoons. These are from moths that I raised over the past couple of months.
There are about 25 of them in the bowl.
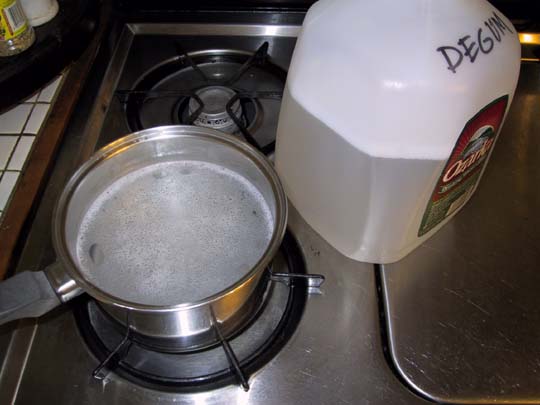
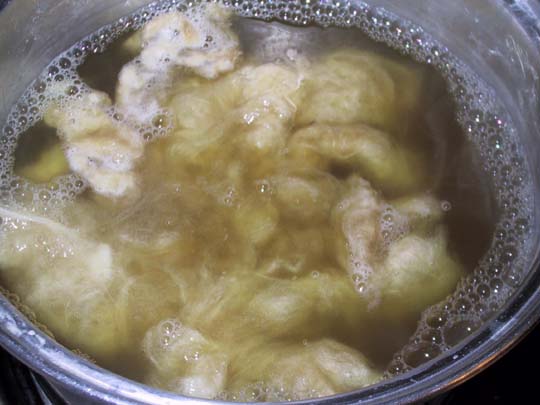
I start the kettle for the degumming bath. Per gallon of water, the solution contains 1/4 cup of Orvus paste and 1/4 cup of washing soda. I bring the kettle just to a boil, then turn it down to low so that it will stay hot, but not bubble at all. It should be below 185'F.
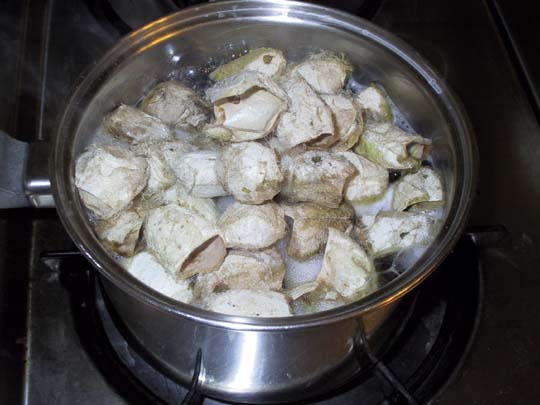
The cocoons naturally tend to float, until they get wet.
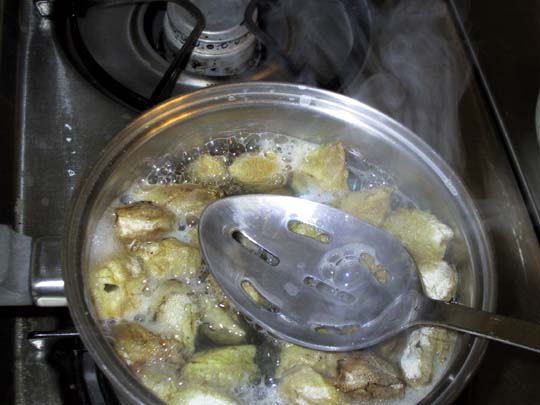
Once they're wetted through, they sink, or float just below the surface. As long as they're all wet, it's OK. I use a slotted spoon to press them down to make sure they're all wet.
This batch degummed very quickly. It can take up to an hour, but these were ready in about fifteen minutes. I think that getting all the crud out, and opening up the cocoons, made them go a little faster.
They're ready, when the cocoons can be easily pulled apart like this. There may be a few little spots that are still tough, but carding takes care of most of that.
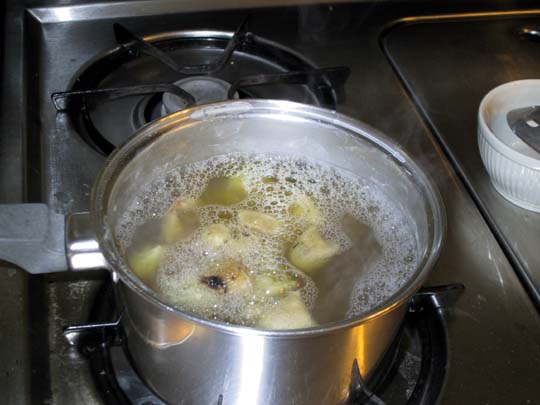
The degummed cocoons.
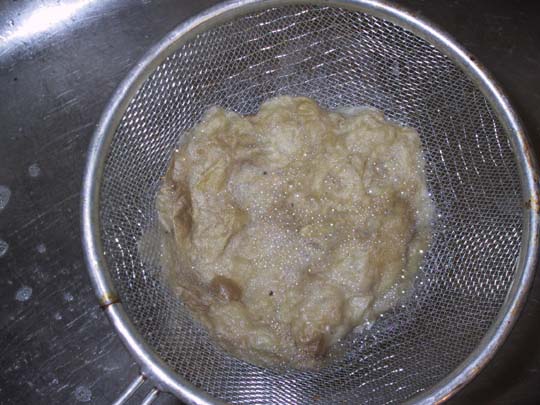
I strain them in a sieve, and rinse thoroughly until they stop sudsing.
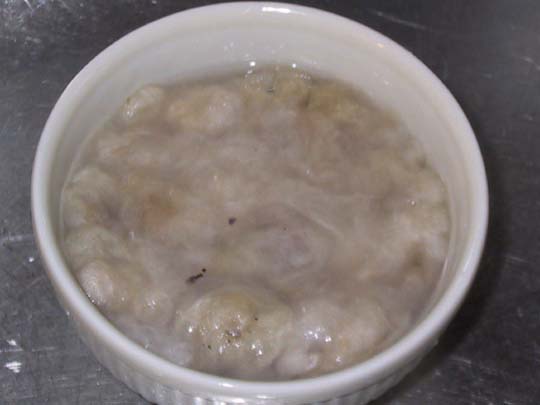
Then, I rinse again with a little citric acid, and then with Milsoft fabric softener. The Milsoft makes a HUGE difference in the ease of working with the silk; it makes the fibers slide and handle nicely.
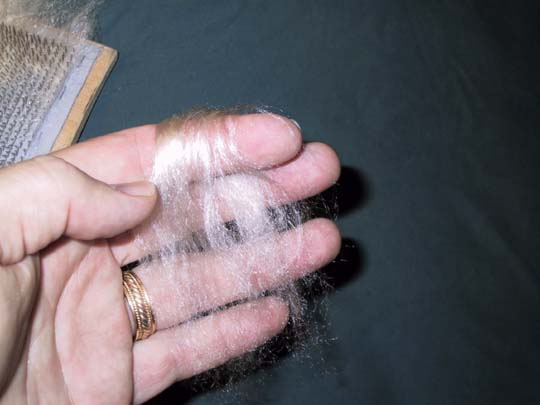
This is after the fiber has been squeezed out.
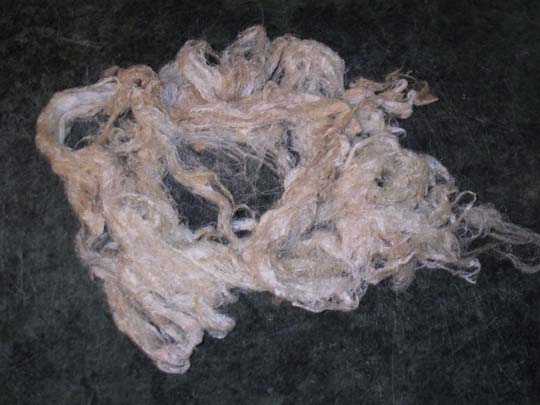
I often press it between paper towels to help get the moisture out.
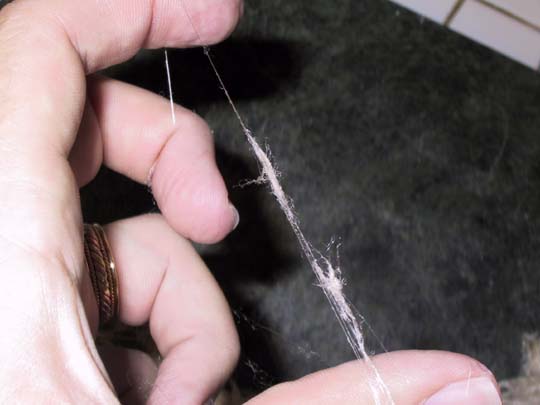
The fiber is a mix of long and short fibers. The long fibers can be many yards in length; before the moth busts out, the cocoon is a single filament with no break, hundreds of yards long. The short fibers are from the cut edge. The short fibers would have been there whether I cut it or not, though, as long as the moth emerges.
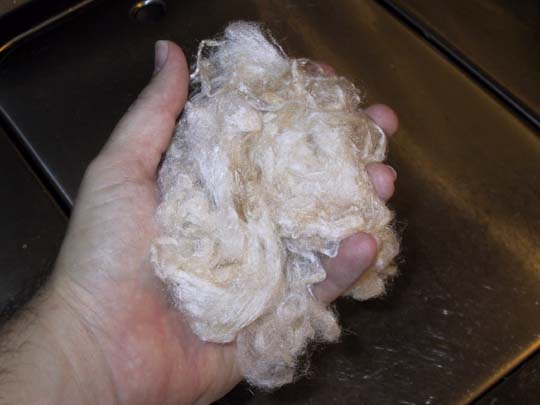
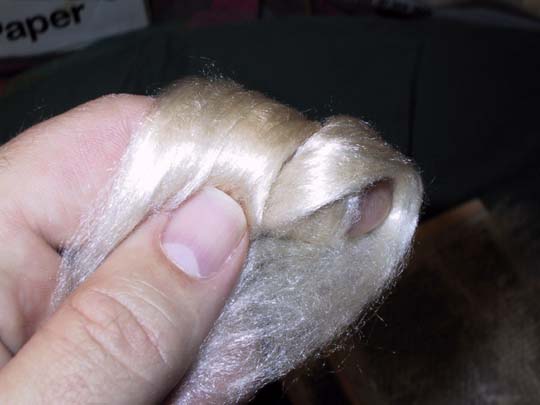
This is after the silk has dried. It's about a third of an ounce.
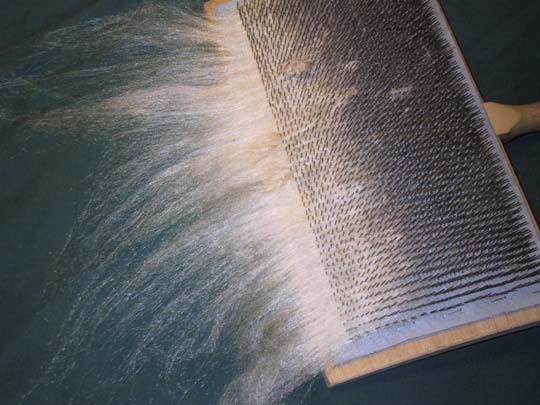
I start carding. I use the tips of the carders, almost more like combs.
This allows me to get the best quality silk.
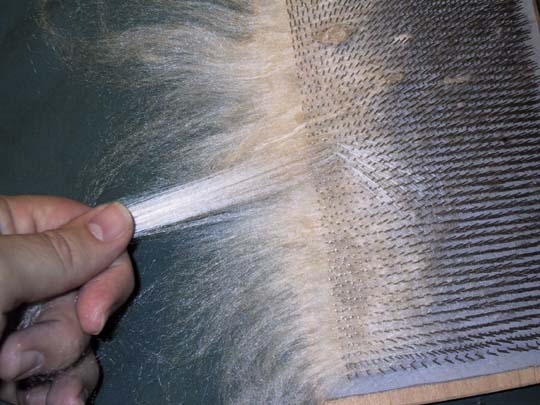
After running the cards through the silk a few times, I start tugging out the long fibers. This is similar to making roving from combs, although I don't pull it into a solid length, I make little tufts, like locks.
This is one of the little tufts. The fibers are at least four inches or so in length. If there is a lot of silk that is more than six or so inches, I will sometimes cut it to be more even.
I build up a little pile, and then put a twist into it to make a little "soldier" - these are what I'll spin from to make the best yarn.
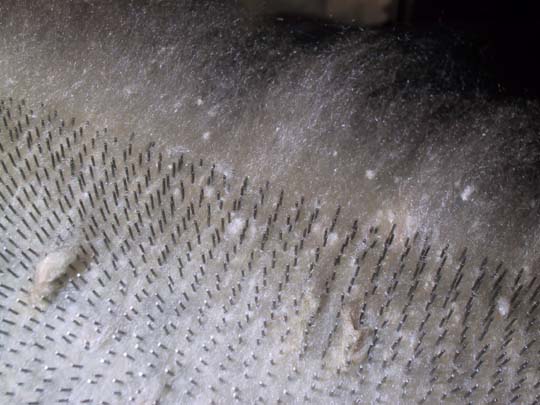
The short bits and noils are caught in the teeth of the carder. I card these together with the shorter fibers to make a very light rolag. This spins up into a much lumpier, but still usable, yarn.
The carder with some of the processed silk.
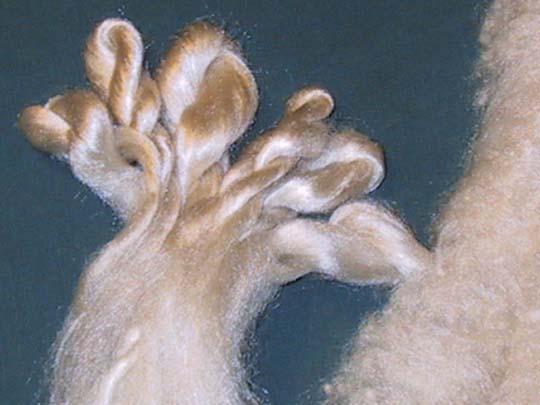
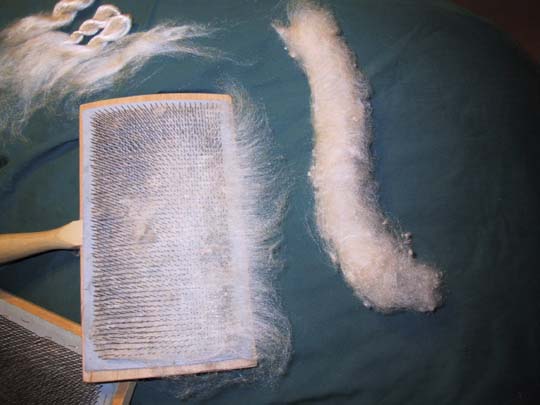
The edge of a rolag, and a pile of the little spinning soldiers.
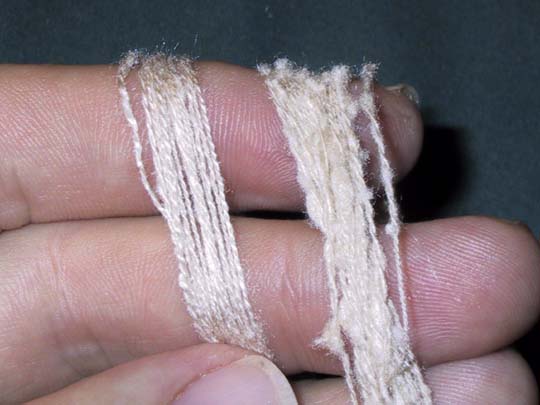
I made just a couple of quick samples with the silk. On the left is the fine yarn - about a 2/50's or so. The combed fibers are easy to use to spin a very fine, even shiny yarn. On the right is the noil yarn, made from the rolag.

This is yarn that I made last year - it's a little heavier, and made from cocoons that were found in the wild. I think that the silk is darker because it sat through the winter wrapped in oak leaves with rain dripping on it.