 |
|
|
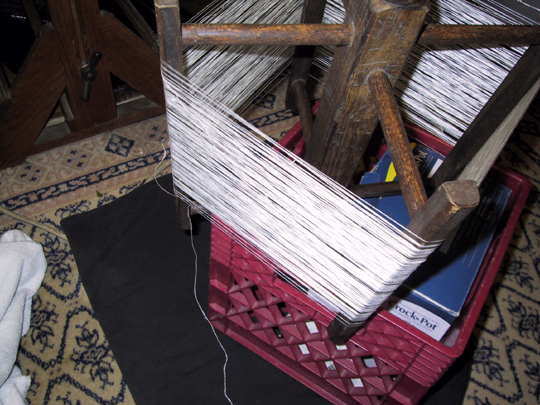
Silk Reeling, Lao Style
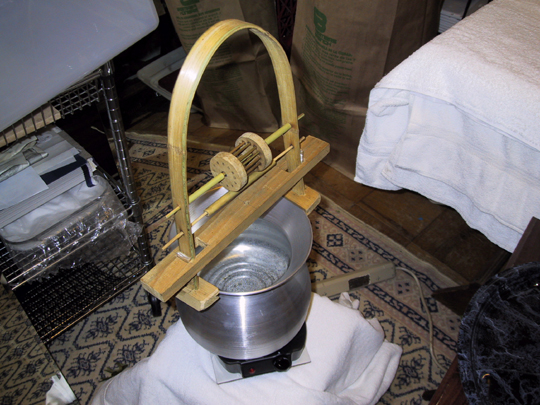
This is a new toy I've acquired for my silk work. It's a traditional Lao silk
reel, handmade custom for me!
This reel was custom-made for me on request, by the folks at Lao
Sericulture Company. When I asked if they would be willing to make me one
of the traditional reels, I was thinking probably forty or fifty dollars...
it would be so neat to have the authentic setup. I was amazed when Sarah emailed
back and said yes, they'd make me one - twelve bucks. Of course, it cost nine
to ship it, and it had to be a certified bank cheque, which was a seven dollar
fee... but I still ended up with the reel in hand for $28.

I found the traditional-shaped aluminum kettle at a local Oriental grocery - I think it was about seven bucks. They come in various sizes, and this was the medium one. These are "sticky rice steaming kettles" - a hat-shaped basket fits in the top to hold the rice, if you're steaming rice instead of simmering cocoons. In the photos from Laos and Thailand, they always look like iron. Some of the more traditional ones are iron - but a lot are just the aluminum, blackened by soot. Mine probably won't ever get black, because I use an electric hotplate.
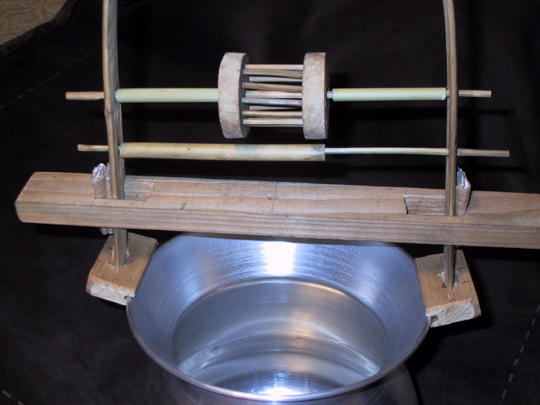
I was concerned that the reel might not fit the kettle, but Sarah put my mind at ease:
"If the reeler doesn’t fit the aluminum pot you have, it’s high-tech design allows for size adjustment by inserting a small wood chip, piece of cardboard, or folded up paper in the joint of the reeler’s legs and cross-piece."
.
I chose cardboard. Works like a charm.
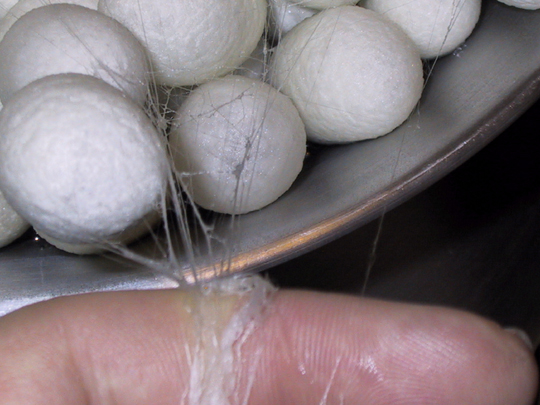
Just like with the other styles of reeling that I've done, this starts with putting the cocoons into the water once it is hot. The main difference between this and the Japanese style reeling, is that the Lao style is all done in the single kettle, over fairly high heat. It's not separated into brushing and reeling basins.
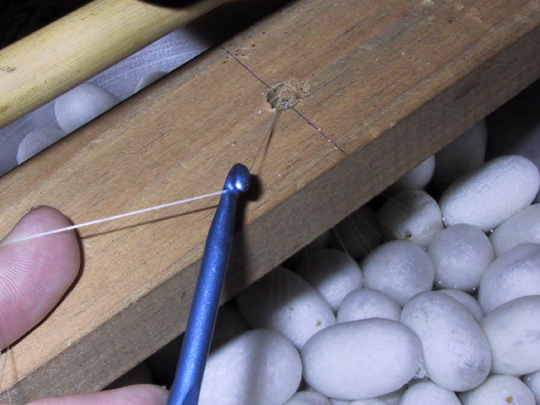
Once I've groped up the ends with a brush, and made a filament, I have to pull it through this little hole. I imagine that eventually I'll end up with an orifice-hook type hook, a bit of bent copper tied to the bar. For the time being, I used a crochet hook.
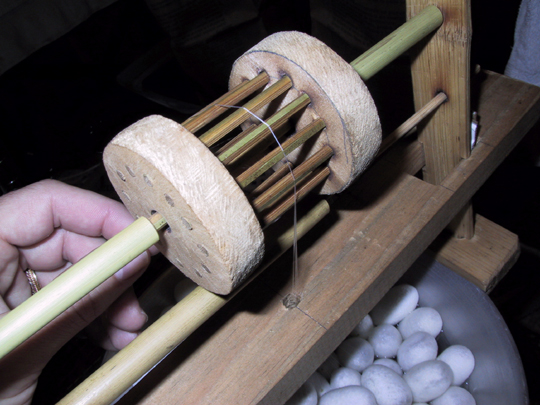
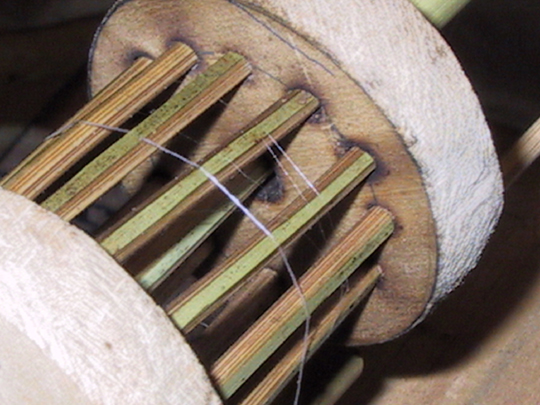
The filament goes up in front of the "hamster cage." I'm going to refer to it as the pulley from now on. It's really quite ingeniously made - there are bamboo bushing rods fitted onto the axle on either side of the pulley, to keep it from sliding too far sideways, while allowing it to revolve freely. When the reel arrived, these bushings were a little too long, and they bound the pulley from moving. I had to do some adjusting with the Dremel. I figured that anything that has a high-tech cardboard adjustment, could stand some whittling to make things fit.
Then, the filament wraps around the pulley, and down the back. It goes below the second roller bar, and back up to rejoin itself.
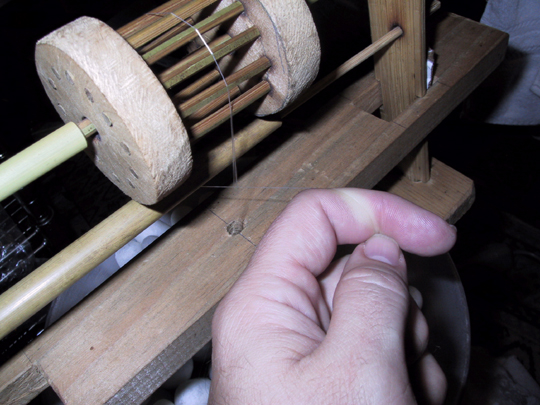
This is where the croissure happens. Croissure is a French word for "crossing." It is a twist of the thread around itself. It's like the first knot that you tie, when tying your shoes - just the thread, wrapped around itself. However, I usually wrap it about 5 times, instead of just once. The finer the thread, the more wraps, and the smoother the filament comes out. Because the thread is all moving in the same direction, the croissure doesn't knot up - it just sort of strangles the thread, and makes it into a nice cohesive filament. Unfortunately, the photo doesn't show the actual crossing very well.
The filament is fairly rough, reeled this way. It will make a slightly slubby silk fabric, with a characteristic linen-like look.
Ocasionally, a thread will wrap around the pulley. I think this is probably the main reason that the hamster-cage design is the traditional favorite - it's easy to get the wrapped threads clear from the pulley this way. It's tough, with a solid pulley.
To increase the thickness of the thread, I stir the cocoons in the kettle. The traditional stirring tool is a flat bamboo stick with a slightly rough end. I used a dinner fork, which worked, but wasn't quite as effective at the stirring aspect. I am working with probably seventy or eighty cocoons; it makes a big thick filament.
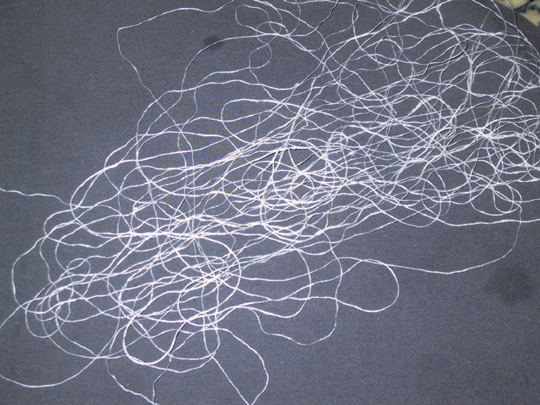
Once the croissure is all sorted out, I just start piling the silk on a flat tray. A basket that looks like a winnowing basket is traditional. I had to put a cloth on the tray, because the silk was hard to photograph otherwise. Amazingly enough, you really can just pile up the damp silk like this, and then pick it back up later. The Indians pour sand over the pile of silk to help keep it in place, the Laotians and Thais usually just pick it up from the tray and wind it onto a spool or skeiner.
I did find that there were some logistics that helped me keep the silk from tangling; I put the tray between my feet, and lower than my knees, so that the silk dropped onto it, rather than being laid sideways - I found that with laying it sideways, I would occasionally drag some of the lower layers with my hand, and that messed things up and caused tangles. A heavier filament also tangles less than a fine one. It's tough to make a filament this thick, after years of working for something an eighth the size!

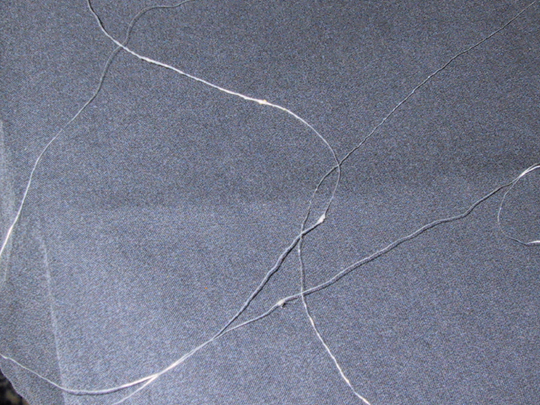
This is something that just doesn't happen with the Japanese style reeling - the bugs sometimes get caught up in the filaments, and you have to pick them out of the thread! I found that if I rub the thread back and forth between my fingers after I pick something out of it, it smooths out the rough spot some. This photo shows the croissure really well; notice that little straight section of yarn where it V's together.

I used a Japanese silk reel bobbin, or Itomaki, to pick up the silk off the tray. It just happened to be handy. I didn't use the zakuri, I just wound it by hand. You can see the rough, slubby texture of the yarn. It also feels very coarse and wiry, much more so than the finer filaments do.
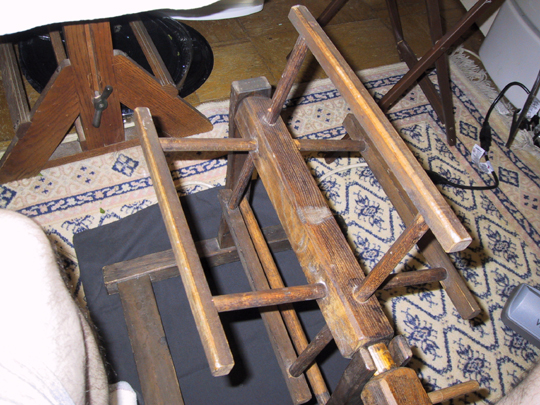
You know that thing Martha Stewart says, when she's going to tell you how to do something fancier, "Now, if you have a little more time...." This is kind of like that, but instead it's "If you have a little more equipment." This is a yarn winder, also called a wool winder or yarn blocker. It's fairly simple construction, but it takes out a step of having to pick up the silk from the pile and wind it onto a spool. Don't mind my hairy knees.
I wind the silk onto the yarn winder, traversing back and forth with my hand so that wet silk is never piled directly onto wet silk. This is essentially the same thing that the rocker arm on the zakuri does. I could wind this silk with the zakuri, but I'm sticking with a more rustic tool traditional to this more village-style technique.
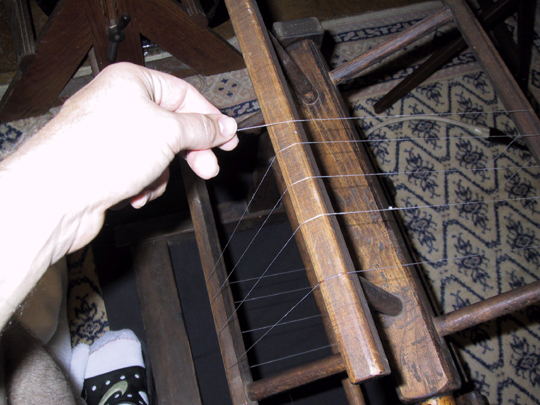
This is the reel after I've wound on quite a bit of silk. It's wound on under pressure, which makes the filament a little less wiggly and a little more rigid than the stuff that's piled up. It will all even out in the later processing, though. Because of the way this particular winder comes apart, I can prop up the "basket" part of it, and end-feed the silk to wind it off. It's easier than winding it backwards, although with a thread this thick, there's very little risk that it would break.

And here's a photo from Darrell Wiens at mulberries.org, of a Lao woman reeling silk in the traditional style.
Photo used by permission of mulberries.org.