Teenage Chickens

The chickens are growing up fast! They’re eight weeks old today.  They will spend long periods of time some distance from their momma, although they still tend to hang out with her when the other hens are around, and she’s still feeding them and gathering them up into the coop at night.


We’ve quite definitely got three pullets (young hens) and two cockerels (young roosters) – this time around, the differences were clear quite young, and have become more pronounced as they grow.


One of the pullets.   This one has a little more of the copper on her back than she really should have, but I think she’s going to grow up to be a lovely hen.


One of the cockerels.  This one is more than a little on the gangly-and-awkward side; hopefully he will eventually grow into the length of his legs, and stop being such a momma’s boy. We call him Urkel.


Another family grouping, with a photo-bomb from Ginger.


I *love* Ginger’s expression.  She always has this look in her eye.  Ginger takes no crap from anybody.

Hatching Day

Chris got me a new camera for our anniversary; a Canon T2i.  I’ve been playing around with the new camera, looking at some hatchling silkworms.

This one’s in the process of hatching.  They bite through the egg shell, bit by bit, and then crawl out.


The lenses on the new camera are working for me quite well; it takes a lot of light and some serious care in the focusing, but I’m getting pretty much what I want.  The thing I want to work on next, is a tiny bit more depth of field…  I’m already shooting with lots of additional light, but I still get a less-than-paper-thin depth of field on these super close shots.  Actually, the straw-like substrate that the worm is walking on, is the fiber in a brown paper sack.

After enough of them hatch out, I brush them off the paper into a little tray, and sprinkle finely chopped mulberry leaf over them.

For comparison, here’s a link to some shots I took a few years back, using the old camera and the add-on tube lens.  The new camera is SO much sharper!  You can really see the difference in the detail level between the shot above, with the T2i, and the one below from the PowerShot (a point-and-shoot):


Please Vote for our Idea!

The Sammons Center for the Arts,  the amazingly cool place where I work, is part of the Refresh Everything Pepsi Challenge.  Our idea is a Family Arts Festival; we want to introduce people to the Arts. You can vote online here, and you can also text 106158 to 73774 from your cell phone.  If you can, vote twice each day – it makes a huge difference.
Please take a minute to vote for us.  I really appreciate it!

Fashionably Late Easter Peeps

We’ve got peeps.

I had tried putting fertile eggs under Sue back in December.  Unfortunately, I made a rookie mistake, and so did she.  I didn’t change her food when I put her in the broody box; a sitting hen needs a leaner diet than a laying hen, to prevent diarrhea.  What she did wrong, was fail to get off the nest to use the bathroom one time.  I imagine that you can see how these two things together led to a nest of very nasty eggs… and nasty eggs get infected with bacteria and don’t hatch. I didn’t post about it then, because it was sad and a let-down.

This time, both of us learned from our mistakes.  I changed up her diet, and moved her off the nest every day to do her business.  When I was on a teaching trip, Chris had to move her.  She sat eight French Marans eggs, five of which developed.  Yesterday, they began making faint plaintive peeping noises to one another and to Sue through the egg shells.  Today, she has five cute fluffy babies!

You can see four of them in this picture.  She’s still keeping them quite close up under her, but all five are fluffy and moving around.


You can see the egg tooth on the center one, a little.

You see the egg tooth better in the close-up.

Sue is fussing with the chicks, and fussing at me. Watch for the one that peeks out from the back side! This was early in the day, when I was still trying to figure out how many chicks there were.

And this is what happens if you tick off a mother hen. The clank that you hear partway through is me adjusting a lamp; Sue did not care for that. Fortunately, her pecks are more of a flying pinch than a stab… she hasn’t drawn blood or really hurt me, yet, although from the look in her eyes, blood remains an option.


Chicks rearranging themselves. The background is a little red, because I turned on the red brooder lamp to give them a little warmth. The bathroom where I’ve got the broody box tends to be cooler than the rest of the house.

Tomatoes, Chickens, Mason Bees.

The tomatoes are doing well.

These were planted the 23rd of January.  They’re doing quite well in their four-inch pots.  I kind of wish I had started them earlier, but by the same token they’re easier to manage when they’re not huge… and there are a lot of them.  I’m going to share some with friends, and also some with Garden Club folks.  Rainbow Garden Club is doing a plant booth at the Earth Day Festival in Oak Cliff, and I’m going to donate the rest for that. We’ve still got most of another month before tomatoes go in the ground, and by that point, I’m sure they’ll be plenty big.

The ones my Dad gave us were planted on the first of December; I picked them up in early January.  They’ve already got flower buds on them!


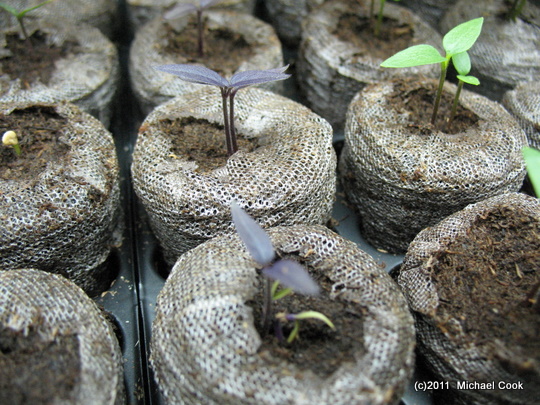
I planted nine different kinds of peppers, too.  I know, now, that I should have started them two weeks ahead of the tomatoes – but I didn’t know that then.  The purple-leaved ones really make me happy.  There are Grande Jalapenos, “Fooled You” Jalapenos (a non-hot Jalapeno for those of us who have digestive challenges and can’t take the heat…), “Explosive Ember” ornamental, “Royal Black” ornamental, “Chilly Chili” ornamental, Big Birtha bell peppers, “Bolivian Rainbow” ornamental… and something else I can’t remember without checking tags.  Oh, and a dozen of the white tomatoes that we enjoyed so much last year; a cherry plant called “Snow White.”


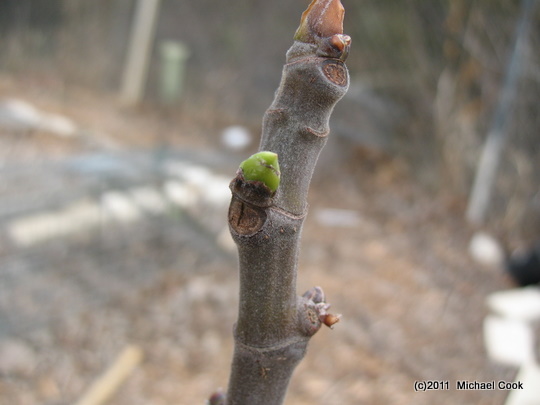
The perennials and shrubs are starting to put out some new growth; this is a green bud on Chris’s fig tree.

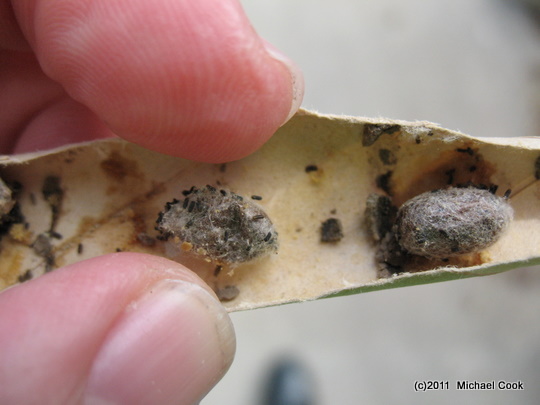
I got some Mason bees from North Haven Gardens.  They’re a super pollinator; because they don’t clean themselves as thoroughly as honey bees, and the pollen sticks to their hairy bodies, 1 Mason bee can do the pollinating work of 120 honey bees.  They’re called Mason bees because they seal up their tube-homes with mud, but I like to think of them in little fez hats and ceremonial robes, calling one another Exalted Grand Master and High Poo-bah.  This is a tube of their cocoons; they are kept in a refrigerator, and they hatch once they get out and warm up.

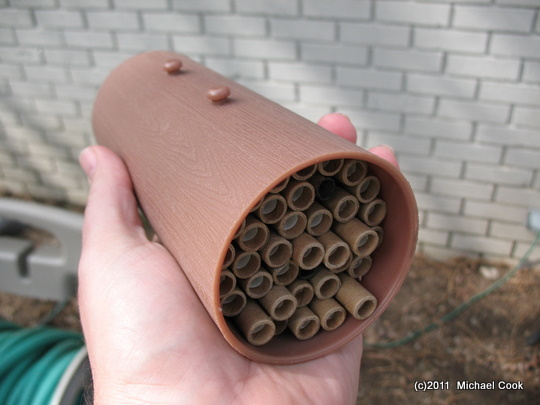
This is the house they will build their little tube nests in.  The bees naturally nest in hollowed stems of certain kinds of plants, but this gives them an ideal situation.

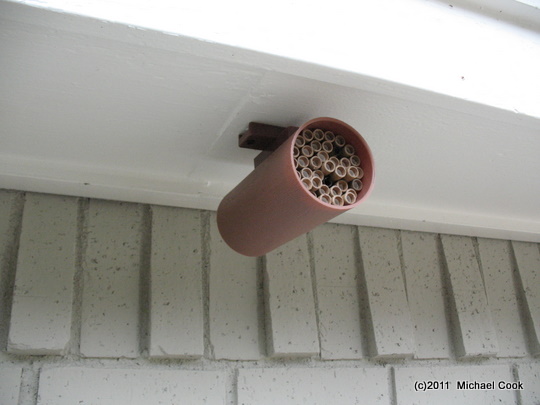
I mounted it up under the eaves of the house, so that it wouldn’t get rained on. The two dark-ended tubes are the ones with the bee cocoons in.


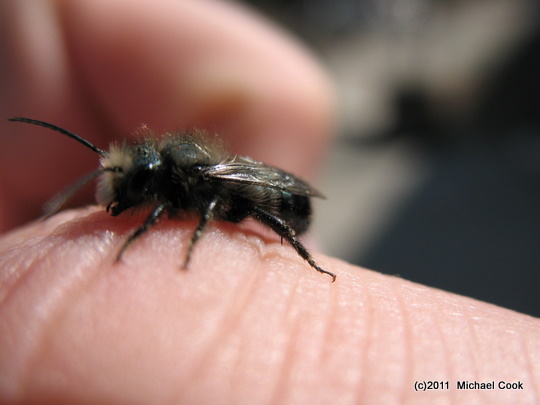
As I was putting the tubes of bees into the house, this little bee crawled out.  After walking around on my hand for a while, he (she?) took off.  Note the super-fuzzy body and head – this is what gives the bee its super pollinating power!


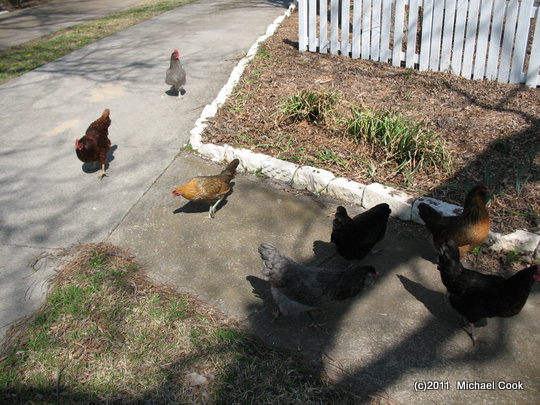
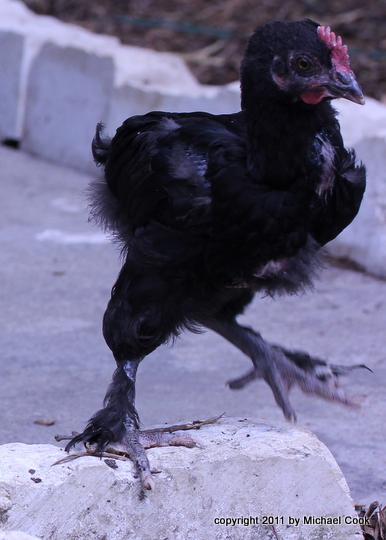
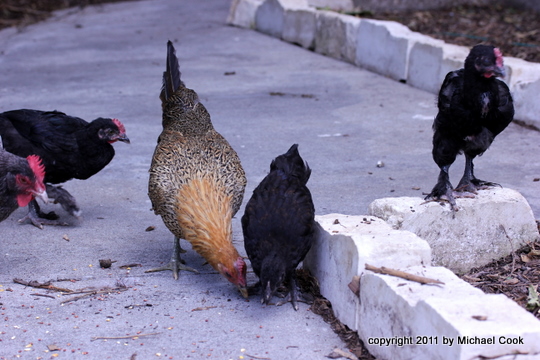
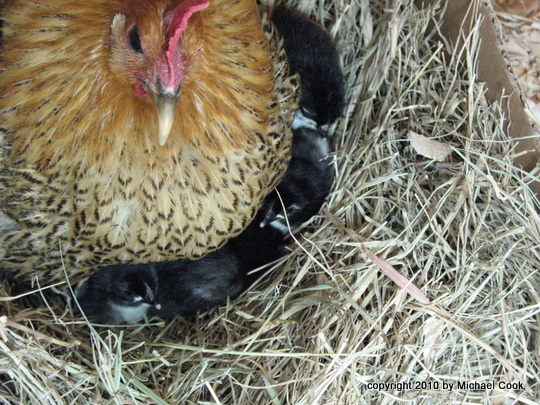
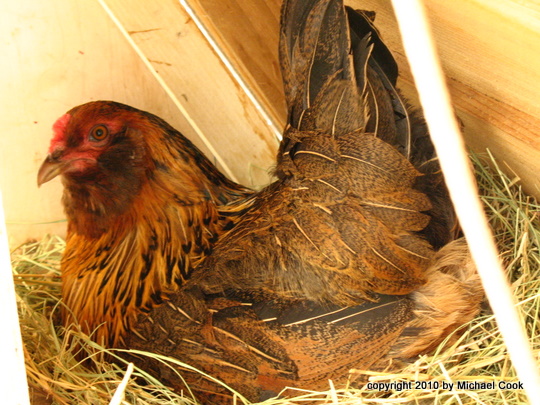
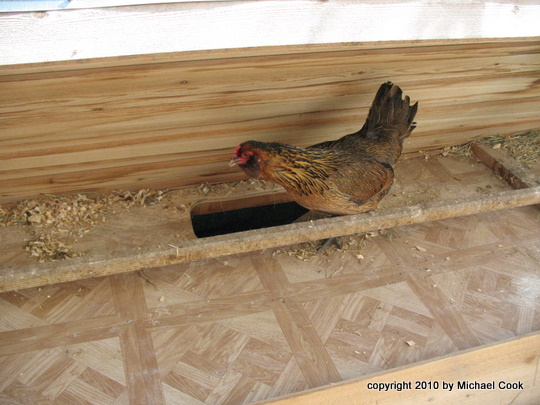
The chickens took a brief stroll in the front yard this afternoon. You don’t need a leash to walk your chickens… just a handful of cracked corn.

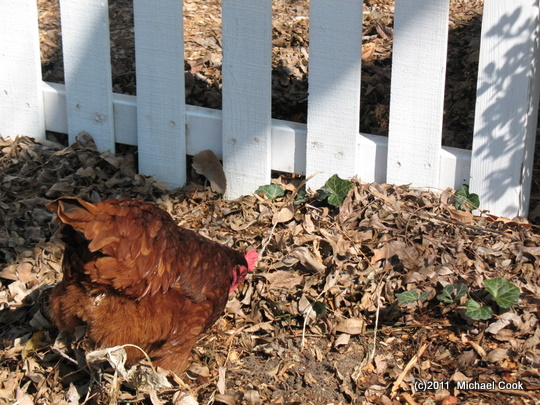
Ruby was digging for bugs in the mulch. Despite my repeated explanations, they were not very interested in eating the weeds.  Fortunately, they were also not interested in eating the daffodils.


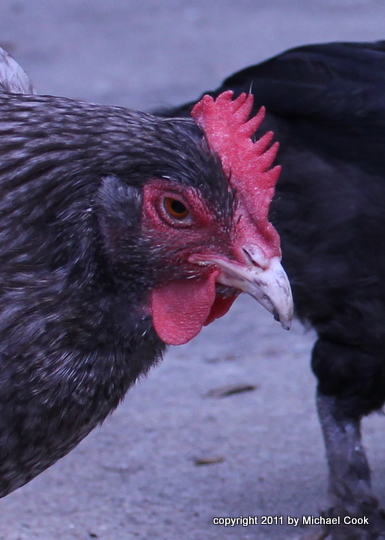
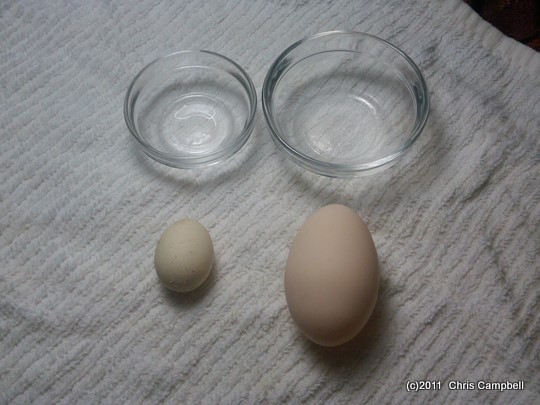
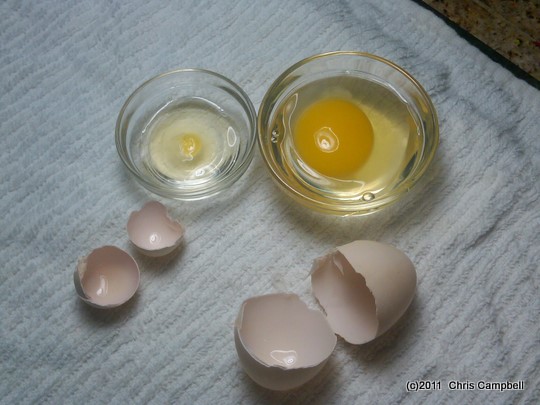
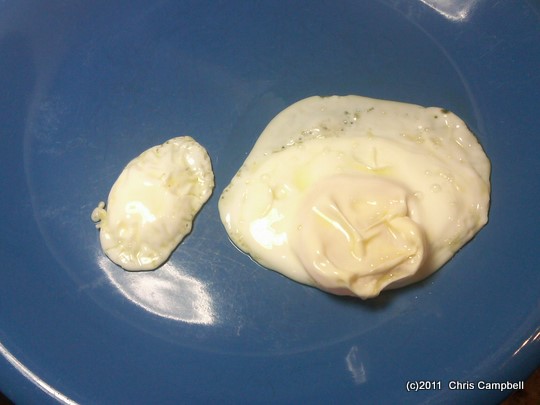
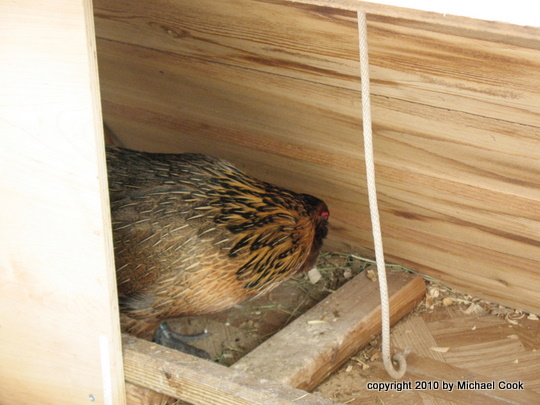
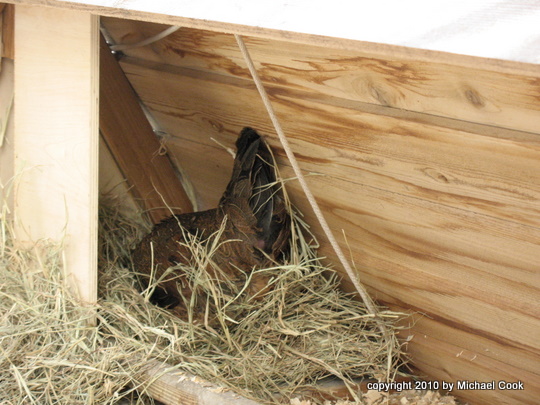
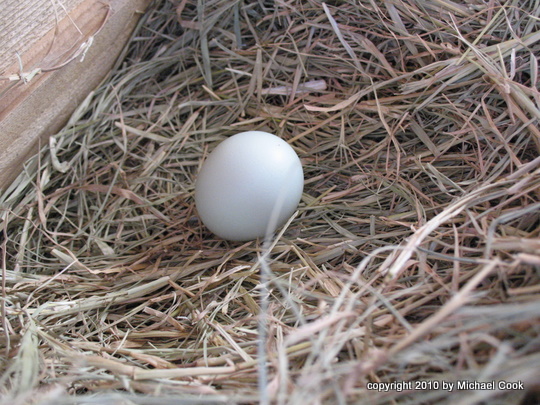
I got one egg early this morning; these are #2, 3, and 4.  Nowadays we are getting four or five each day.  Jumbo Ginger is taking a break, and Sue is just getting back into laying, but five eggs a day certainly keeps me happy.

After growing it both my beard and my hair for a couple of months, I decided that it was a pain in the butt, a lot of extra maintenance, and a cause of a lot of sweat.  I decided to keep the beard, but much shorter, and went back to a short buzz on the head.


Witch Egg

Our Phoenix hen, Sue, laid a witch egg.

Chris found it by the food bowl.  From reading up, they’re called “Witch eggs,” “Dwarf eggs,” “runt eggs,” and “wind eggs.”  Some people call them “fart eggs.”  We think that it may have been her first egg back on the cycle – she had stopped laying for a while, when she sat and went broody, and hadn’t laid since.  For those of you who asked after the eggs I put under Sue – sadly, they did not hatch.  She and I both made rookie mistakes – she failed to get up off the eggs to do her business one afternoon, and I failed to change her diet to a higher-carbohydrate, lower-protein one to prevent loose stools.  An entire clutch of eggs evenly coated in chicken diarrhea is NOT a pretty thing to come home to.  I cleaned them according to instructions I found on the internet, rinsing gently in tepid water, and cleaned her nest, and changed her diet – but the damage had been done, and the eggs all eventually succumbed to bacteria.

The tiny egg next to one of Sue’s normal eggs. Sue has very long, slender eggs; sometimes both ends are equally pointed, which I think is cool.   Sue is an odd bird – her eyes are black from side to side, and she has spurs like a rooster.


Often, these tiny eggs won’t have any yolk.  The shell is considerably thicker than the normal egg.  This one has a tiny proto-yolk.


Just to see what it would do, I fried both of them, sunny-side-up. Unfortunately, the tiny yolk was surrounded by an area of thickened white, so it didn’t make a cute tiny bubble of yellow.  It tasted just fine, though.

When Ya Gotta Go…

Monday, I was working on cleaning out the chicken coop.  Rawnell decided that she needed to lay an egg.  In spite of the whole top of the coop being open, she walked up the plank and plopped herself on the nest.  I respectfully left her alone; a girl needs some privacy for these things.

Apparently it was a false alarm, though – after a few minutes, I went back outside, and she was out pecking with the other chickens.  I got back to the business of shoveling chicken poo.

I got the coop cleaned out – the linoleum flooring makes it easy!  An area on one side was a little wet, and needed to air-dry, but Rawnell decided it was egg time again.

She walked around cackling. Usually, hens make this noise after they’ve laid an egg, but you also get it sometimes if they’re distressed or annoyed.

The nest box doesn’t look right with no hay in it. She walked up the ramp, around the top of the coop, and back down, several times. “Where’s the nest with the hay in it? I swear I left it here just a minute ago…”

She tried looking at it from a different angle. This didn’t work.

I put the hay and the shavings back in, and she settled down in a nest box on the opposite end from the usual one. Of course, with seven hens, they ALL decide that they have to use a single box. It makes for convenient egg-collecting, but sometimes causes a bit of a traffic jam.

She sat (and I left her alone) for probably ten minutes, before she decided that box just wasn’t going to work. She was agitated and fidgety, and finally got up and crossed the coop to the usual box. She fussed and fluffed and rearranged. I gave up on putting the coop back together, and went inside.

After folding a load of laundry and coming back out, I found one perfect, beautiful blue egg.

My Very Tiny Singles: Let Me Show You Them.

I’m working on twisting up a LOT of silk for a project.  This is a bobbin nearly-full of twisted singles.

It’s a Very Fast Flyer bobbin on my Lendrum wheel.  I haven’t done a count, but I’m guessing in about the 1500 yard range.  The camera is not off its white balance; the silk really is butter-yellow.  It’s made from special cocoons that I raised, blended with silk that I’ve made at various events over the past year or so, plus silk from other sources.

Very close to, you can actually see some of the barber-pole effect – two of the filaments in this part of the single are yellow, two are white.  The yellow will come out, unfortunately, during degumming.  The very close shot makes it look like the single is pretty big…

But they are not big.

This is a quick finger-twist to show what the finished yarn will look like before degumming.  It’s going to be about the *weight* of a medium-size sewing thread, although with the lower twist, it will have more loft and more shine, so it will look bigger.  Because I want a yarn that will be very shiny and “silky,” this is low-twist; higher twist would make it stronger, but less lustrous.  The finished yarn will be a 40d3x2 organzine.

And, totally unrelated to silk, but remarkably similar in color… Chris is working on making his first batch of mozzarella cheese!  This started with some unhomogenized whole milk that we got at a local natural grocery, and it has a delicious buttery flavor.

The ball of finished cheese looks to me a lot like bread dough – which makes sense, as it’s been stretched and kneaded.  It has to rest in ice water for a while, then it’s ready for eating!

How I Throw

A friend of mine recently asked me how I go about throwing (twisting) my filament silk yarns.  Throwing is needed to turn the totally-flat raw silk into tram and organzine; it’s a little like spinning, and a little like plying, but it’s really its own thing.

To start with, I wind all the filament onto silk-throwing spools.  These special spools have fat cores and gutta-percha ends, which won’t snag on the filament.  They sit flat on their butts, so that you can pull upward and unwind the silk without putting pressure on it and causing it to break.  These are old spools from a silk factory, used on the throwing machines.

I put the spools flat on their butts on the floor.  I often use a shoe-box just to keep them conveniently corralled; it makes them easier to put away when I’m done, and keeps the cat from knocking them over.  One thread comes off of each spool, straight up to the ring which is affixed to the table with a clip.

The ring, the clip.  I’ve got two rings on it this time, which sometimes helps even out the tension if there’s a rough spot.  The large black ring is an onyx finger ring.  The small gray ring is a metal-oxide fishing line guide.  The clip is a chip-clip from the hardware store.

My left hand sits on my left thigh, stationary.  There’s a tiny adjustment of the grip as the filament slips through it.  As the right hand is moving to the right, the left hand resists just enough to stop the right hand from pulling the silk out of it; as the right hand moves back to the left, it allows the silk to slide through and to the wheel.  It takes more tension than you’d think on the wheel, to get this stuff wound on without kinks.  The silk that I’m working on now is low-twist, high-shine organzine; it has about 7.5 twists per inch.  For sewing thread, the number is more like 20.

The filament in this photo really should be more horizontal, like the shot before; I had to let go with my left hand to shoot the picture.  My right hand sits on my right thigh, rocking back and forth, pivoting on the wrist.  As it moves from left to right, it’s sliding along the silk to get a new four-inch length.  As it moves back from right to left, eventually bumping the left hand, it is gripping the silk as the left hand allows the new length to pass forward to the wheel.  It works like the stitch regulator on a sewing machine.  To increase the amount of twist, I either adjust the ratio on the wheel, or I adjust the distance between my two hands.  If the right hand is closer to the left, I get a smaller bite of silk each time.  If it’s further away, I get more silk each time.  I time the motions so that they coincide with the feet on the pedals; this way I know that right-left advances four inches of silk, which equates to 30 revolutions of the flyer (for this particular silk) – thus adding 7.5 twists per inch.  If I’m doing high-twist, it’s typically two pairs of treadles (left-right, left-right) to one hand motion.  I find it’s a lot easier to measure roughly four inches or so, and the scope of error is a lot less.  If you’re aiming for an inch, and you end up with an inch and a half, you’re off by half… if you are aiming for four inches, and you’re off half an inch, you’re only off about twelve percent.